
 Tweet
Tweet
WordPress is indeed an amazing application, which has long since settled in the hearts of users.
With its reliable back-end, user-friendly front-end and tons of fancy themes coming out every day, it’s perhaps the best tool to start your new blog or web hosting store (or whatever other type of site you might think of) with.
However, good web solutions often come at a price. Resource usage-wise, WordPress sites have proven to be more CPU-intensive as compared to simple HTML pages or to microblogs.
No matter if you have a small-sized blog or a large, traffic-intensive portal, experts recommend that you figure out a way to cache your web content so as to save up server resources and give your visitors the ultimate on-site experience they anticipate from you.
Your WordPress environment generally will not offer caching options, so you have to pick a solution yourself.
Most free CDNs, for example, will copy and cache the static files in your website – .css files, .js files, etc.
Files, which are generated dynamically with queries to the database (like with blog posts or category pages) will not be cached, as they are created the moment a visitor wants to see them (Note: premium tiers with most CDN providers allow caching of dynamic pages).
There are also many caching plugins for WordPress around the web. However, most of them are feature-loaded, which may cause increasing and unnecessary use of resources.
This is where a dynamic caching platform like Memcached kicks in.
As a distributed memory caching system, Memcached caches only queries that are characteristic of database-driven solutions like WordPress.

Our cloud hosting platform offers native support for Memcached and you can enable Memcached for your WordPress-powered site in a few quick steps.
Before doing that, you will need to first make sure that you are using PHP 5.6 (or an older version).
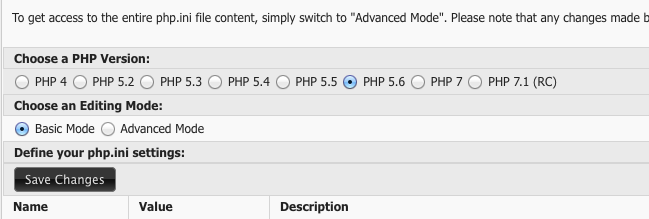
Keep in mind that the PHP 7 series do not yet offer support for Memcached.
Here are the main steps to enabling Memcached for your WordPress-based site:
Step 1: Enable the “Memcached” option in the PHP Settings section of the Web Hosting Control Panel;

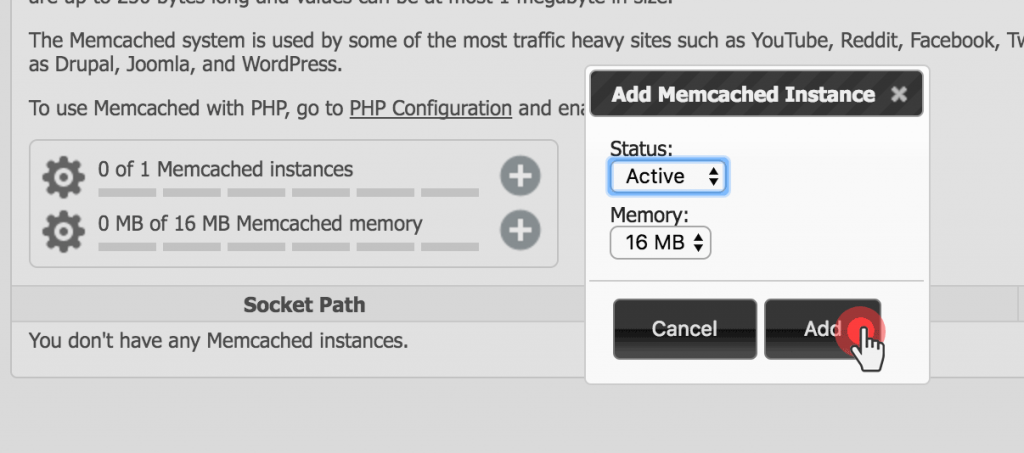
Step 2: Create a new Memcached instance from the Control Panel (Advanced-Memcached) using the default settings;
Step 3: Go to the WordPress folder in the File Manager.
Locate the wp_config.php file and add the following line:
just after
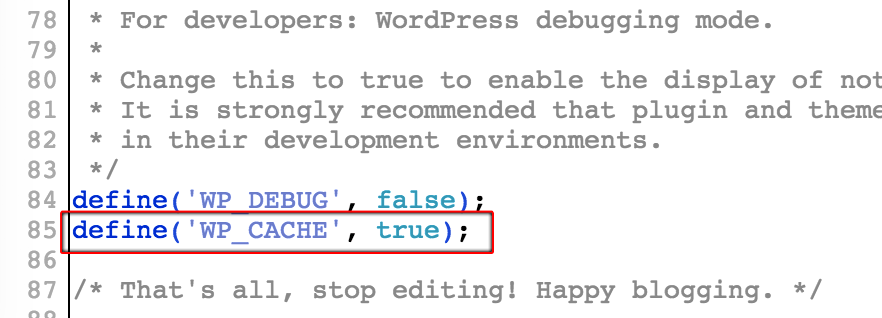
This will enable WordPress to use caching.
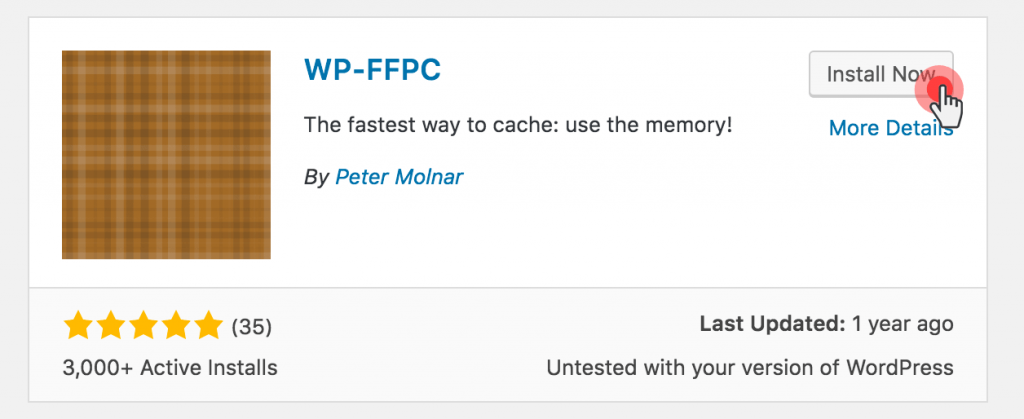
Step 4: Install the WP-FFPC plugin from the WordPress admin area.
WP-FFPC is a plugin that uses system memory to cache blog posts and APCu/Memcached to store data.
It will pre-cache all your blog posts before users even go to your website.
Step 5: Activate WP-FFPC
Step 6: Go to Backend Settings
Step 7: Enter the path to the Memcached socket (you can find it in the Memcached section of the Control Panel) in the hostname field.
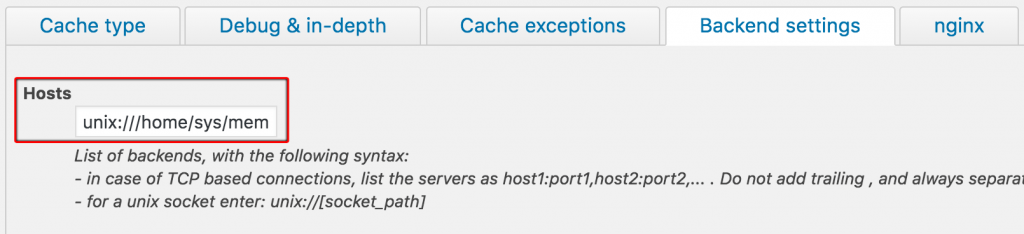
Step 8: Click on Save Settings.
That’s it!
Memcached is now enabled for your WordPress site.
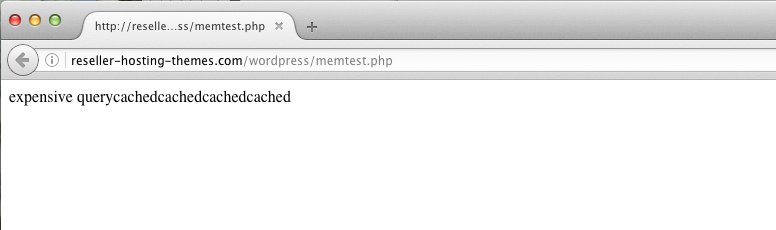
You can test if Memcached is working fine on your site using a simple script.
This one is borrowed from here: http://dorkage.net/blog/2009/02/05/memcached-test/, albeit slightly modified:
it should output “expensive query” and the actual query.
When you refresh, it should just output the query.
At the moment, Memcached is enabled by default with the Corporate and Enterpriseweb hosting packages and is included as an optional service with the Starter andBusiness plans.
tutorial on how to set up Varnish on a WordPress-based website will be published soon too so stay tuned.
Source : https://blog.resellerspanel.com/how-to-tutotirlas/set-up-memcached-on-a-wordpress-site.html
With its reliable back-end, user-friendly front-end and tons of fancy themes coming out every day, it’s perhaps the best tool to start your new blog or web hosting store (or whatever other type of site you might think of) with.
However, good web solutions often come at a price. Resource usage-wise, WordPress sites have proven to be more CPU-intensive as compared to simple HTML pages or to microblogs.
No matter if you have a small-sized blog or a large, traffic-intensive portal, experts recommend that you figure out a way to cache your web content so as to save up server resources and give your visitors the ultimate on-site experience they anticipate from you.
Your WordPress environment generally will not offer caching options, so you have to pick a solution yourself.
Most free CDNs, for example, will copy and cache the static files in your website – .css files, .js files, etc.
Files, which are generated dynamically with queries to the database (like with blog posts or category pages) will not be cached, as they are created the moment a visitor wants to see them (Note: premium tiers with most CDN providers allow caching of dynamic pages).
There are also many caching plugins for WordPress around the web. However, most of them are feature-loaded, which may cause increasing and unnecessary use of resources.
This is where a dynamic caching platform like Memcached kicks in.
As a distributed memory caching system, Memcached caches only queries that are characteristic of database-driven solutions like WordPress.
Our cloud hosting platform offers native support for Memcached and you can enable Memcached for your WordPress-powered site in a few quick steps.
Before doing that, you will need to first make sure that you are using PHP 5.6 (or an older version).
Keep in mind that the PHP 7 series do not yet offer support for Memcached.
Here are the main steps to enabling Memcached for your WordPress-based site:
Step 1: Enable the “Memcached” option in the PHP Settings section of the Web Hosting Control Panel;
Step 2: Create a new Memcached instance from the Control Panel (Advanced-Memcached) using the default settings;
Step 3: Go to the WordPress folder in the File Manager.
Locate the wp_config.php file and add the following line:
| 1 | define('WP_CACHE', true); |
| 1 | define('WP_DEBUG', false); |
This will enable WordPress to use caching.
Step 4: Install the WP-FFPC plugin from the WordPress admin area.
WP-FFPC is a plugin that uses system memory to cache blog posts and APCu/Memcached to store data.
It will pre-cache all your blog posts before users even go to your website.
Step 5: Activate WP-FFPC
Step 6: Go to Backend Settings
Step 7: Enter the path to the Memcached socket (you can find it in the Memcached section of the Control Panel) in the hostname field.
Step 8: Click on Save Settings.
That’s it!
Memcached is now enabled for your WordPress site.
You can test if Memcached is working fine on your site using a simple script.
This one is borrowed from here: http://dorkage.net/blog/2009/02/05/memcached-test/, albeit slightly modified:
| 1 2 3 4 5 6 7 8 9 10 11 12 13 14 15 16 17 18 19 20 21 22 |
<!--?php //memcached simple test $memcache = new Memcache; $memcache->connec t('unix:///home/sys/memcached.sock', 0) or die ("Could not connect"); $key = md5('42data'); //something unique for ($k=0; $k&amp ;amp;lt;5; $k++) { $data = $memcache->get($k ey); if ($data == NULL) { $data = array(); //generate an array of random stuff echo "expensive query"; for ($i=0; $i<100 ; $i++) { for ($j=0; $j<10; $j++) { $data[$i][$j] = 42; } } $memcache->set($k ey,$data,0,3600); } else { echo "cached"; } } ?--> |
When you refresh, it should just output the query.
At the moment, Memcached is enabled by default with the Corporate and Enterpriseweb hosting packages and is included as an optional service with the Starter andBusiness plans.
tutorial on how to set up Varnish on a WordPress-based website will be published soon too so stay tuned.
Source : https://blog.resellerspanel.com/how-to-tutotirlas/set-up-memcached-on-a-wordpress-site.html

Comment