
 Tweet
Tweet
Launched on our platform less than a year ago, KVMs have managed to draw a growing stream of users who are looking for more flexibility when it comes to utilizing server resources. One of the key advantages of KVM serversover other virtual hosting platforms like OpenVZ is the ability to install your own Operating System. In this tutorial, you’ll see how you can install a custom Operating System on your KVM machine in a few quick and easy steps. 
Operating System choices on KVM
The philosophy behind KVM is “full virtualization at the hardware level”.
Built on top of Linux, the KVM technology involves complete simulation of the physical server’s hardware whereby each KVM user is granted a dedicated chunk of the CPU, storage, memory, etc. resources and permission to install an Operating System of their choice.
This way, albeit based on Linux, KVM supports multiple guest Operating Systems such as FreeBSD, apart from regular Linux distributions like Ubuntu, Debian and CentOS.
Currently, you and your KVM VPS customers can choose from among the following OSs and have them installed automatically:
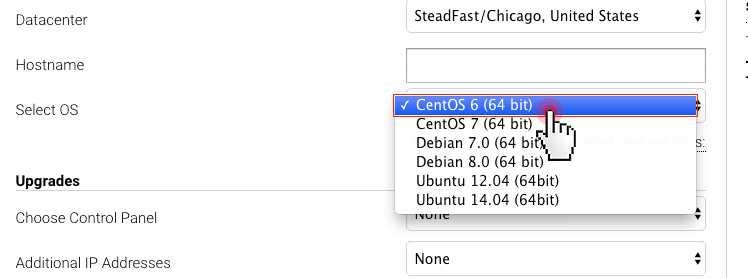
Step 1: Select an OS template from the ‘Select OS’ menu on the order form:
Step 2: Our team will set up your KVM with the selected OS and will send you the login details for your SolusVM Admin Panel;
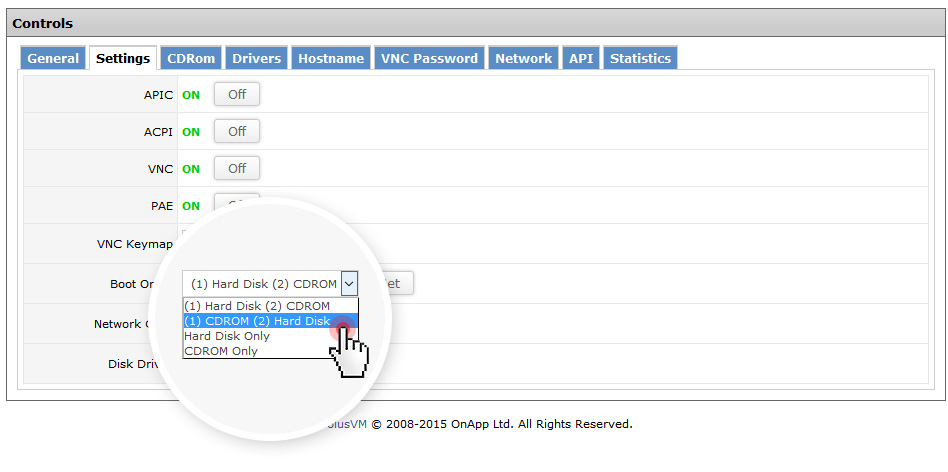
Step 3: Log into your SolusVM Admin Panel and change the boot order to CD-ROM. To do that, go to Manage and select Settings:
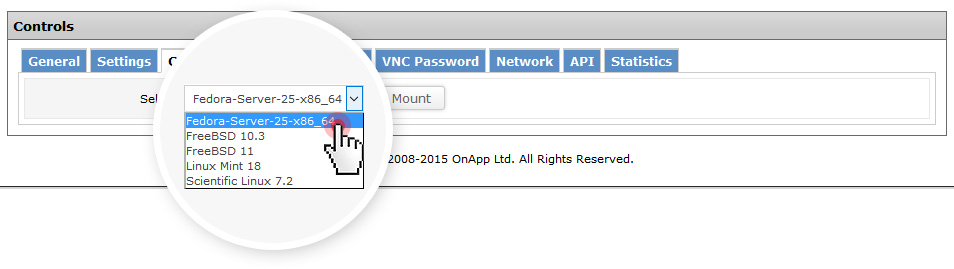
Step 4: From the CD-ROM tab, choose the ISO image you want to mount;
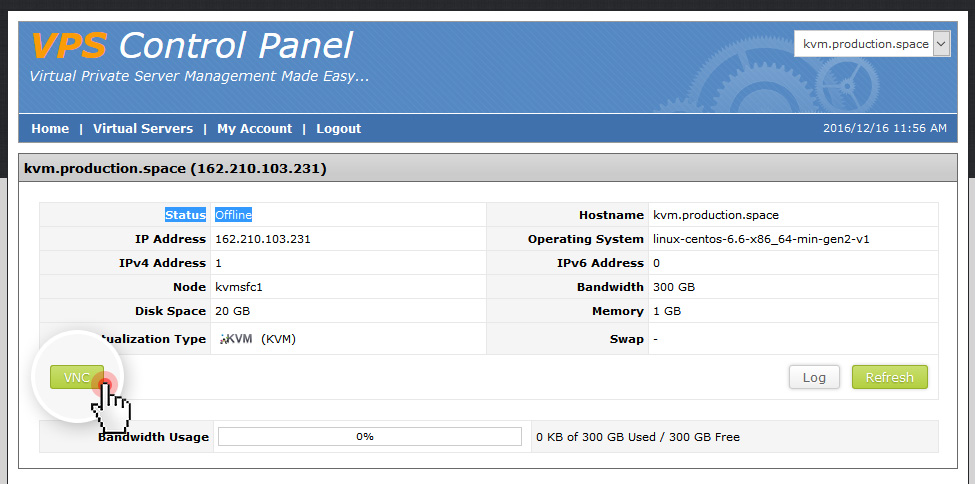
Step 5: Proceed with the installation steps from your virtual console (VNC);
Step 6: When all installation steps are completed, you will get the following message:
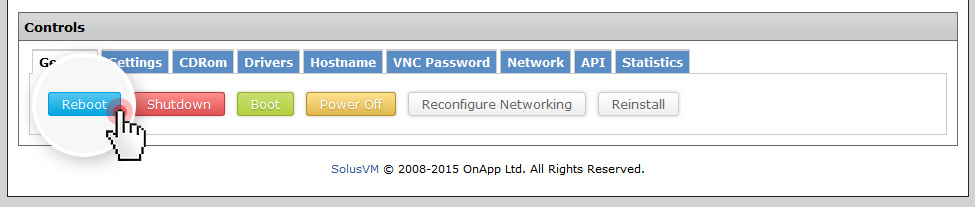
CD–ROM Mounted. A reboot is required for the changes to take affect.
As soon as you reboot your server, your custom OS will be installed and ready to go.
That’s it! Now you know how to install an alternative Operating System on your KVM server.
We’ll be adding new ISO image-based OS installation options in the SolusVM Admin Panel. We’ll keep you updated, so stay tuned.
Source : https://blog.resellerspanel.com/virtual-private-servers/install-operating-system-on-kvm-via-iso-tutorial.html
Operating System choices on KVM
The philosophy behind KVM is “full virtualization at the hardware level”.
Built on top of Linux, the KVM technology involves complete simulation of the physical server’s hardware whereby each KVM user is granted a dedicated chunk of the CPU, storage, memory, etc. resources and permission to install an Operating System of their choice.
This way, albeit based on Linux, KVM supports multiple guest Operating Systems such as FreeBSD, apart from regular Linux distributions like Ubuntu, Debian and CentOS.
Currently, you and your KVM VPS customers can choose from among the following OSs and have them installed automatically:
- CentOS 6 (64 bit)
- CentOS 7 (64 bit)
- Debian 7.0 (64 bit)
- Debian 8.0 (64 bit)
- Ubuntu 12.04 (64bit)
- Ubuntu 14.04 (64bit)
- Fedora 25
- FreeBSD 10.3
- FreeBSD 11.00
- Linux Mint 18
- Scientific Linux 7
Step 1: Select an OS template from the ‘Select OS’ menu on the order form:
Step 2: Our team will set up your KVM with the selected OS and will send you the login details for your SolusVM Admin Panel;
Step 3: Log into your SolusVM Admin Panel and change the boot order to CD-ROM. To do that, go to Manage and select Settings:
Step 4: From the CD-ROM tab, choose the ISO image you want to mount;
Step 5: Proceed with the installation steps from your virtual console (VNC);
Step 6: When all installation steps are completed, you will get the following message:
CD–ROM Mounted. A reboot is required for the changes to take affect.
As soon as you reboot your server, your custom OS will be installed and ready to go.
That’s it! Now you know how to install an alternative Operating System on your KVM server.
We’ll be adding new ISO image-based OS installation options in the SolusVM Admin Panel. We’ll keep you updated, so stay tuned.
Source : https://blog.resellerspanel.com/virtual-private-servers/install-operating-system-on-kvm-via-iso-tutorial.html