The login pages of the Web Hosting Control Panel and the Reseller Control Panel have been socialized, so customers and resellers can now access their accounts through their social media profile(s) in Facebook, Google+ and Yahoo!.

Also, the social login functionality is set to work with multiple web hosting and reseller hosting accounts at a time, so no matter how many accounts you have, you can log into all of them from your social media profile(s).
This is a great one-login solution for social media users, especially for those of you who have several hosting/reseller accounts, since there will be no need to remember tons of usernames and passwords.
How to log into the Hepsia Control Panel
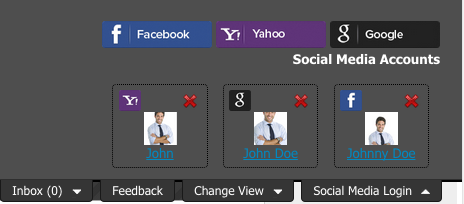
To be able to log in from their social profile(s), users will first need to link their hosting account(s) with their social media account(s). They can do that from the Social Media Login tab in the upper right-hand corner of the Control Panel’s header bar:

All they need to do is click on the icon associated with the social media channel they want to link their account with:

Right after that, an icon informing them that they have connected with the respective social media profile successfully will show up:

The next time a user opens the login page of the Control Panel, they will see a list of social media buttons for instant access through their social profiles:

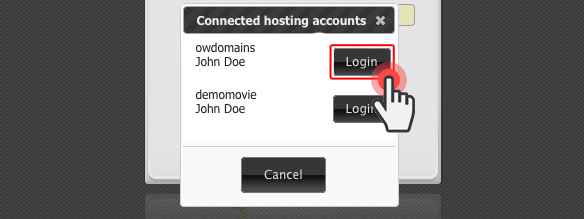
If the user has more than one hosting account, they will be able to connect in the same way to all of them from their social profiles. Then, every time the user opens the login page and click on a social channel icon, they will see a list of their hosting accounts and will be able to choose the one they want to access at a given moment:

Also, once logged in, the user will be able to seamlessly switch between the different hosting accounts.
How to log into the Reseller Control Panel
The social login functionality is also enabled for resellers. They will be able to log into the Reseller Control Panel through any of their social media profiles using the Social Media Login tab in the upper right-hand corner of the header bar.

If a reseller has more than one reseller account, they will be able to connect to all of them using their social profile(s).
Also, they will be able to use the same social login option with their web hosting accounts, if they have any.
This way, once logged in, the reseller will be able to seamlessly switch between the different reseller and hosting accounts.
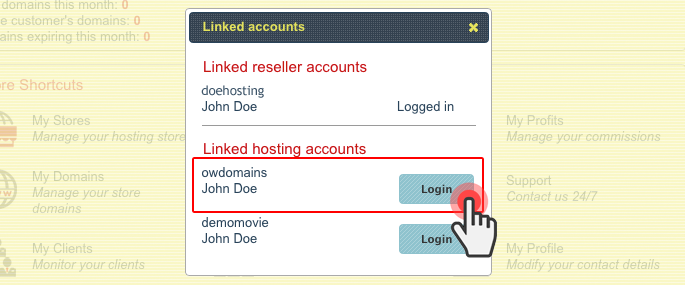
To see a list of the accounts they have linked their social profile(s) to, they will need to click on the icon of the social channel they have linked from. A window will pop up with the following information:


Also, the social login functionality is set to work with multiple web hosting and reseller hosting accounts at a time, so no matter how many accounts you have, you can log into all of them from your social media profile(s).
This is a great one-login solution for social media users, especially for those of you who have several hosting/reseller accounts, since there will be no need to remember tons of usernames and passwords.
How to log into the Hepsia Control Panel
To be able to log in from their social profile(s), users will first need to link their hosting account(s) with their social media account(s). They can do that from the Social Media Login tab in the upper right-hand corner of the Control Panel’s header bar:


How to log into the Reseller Control Panel
The social login functionality is also enabled for resellers. They will be able to log into the Reseller Control Panel through any of their social media profiles using the Social Media Login tab in the upper right-hand corner of the header bar.

Also, they will be able to use the same social login option with their web hosting accounts, if they have any.
This way, once logged in, the reseller will be able to seamlessly switch between the different reseller and hosting accounts.
To see a list of the accounts they have linked their social profile(s) to, they will need to click on the icon of the social channel they have linked from. A window will pop up with the following information:


Comment